
How Do I Set Black & White as My Default Printing Option?
Set your printer driver to use black and white for future print jobs, unless you change the setting for a particular job.
Important: Every printer driver may look different depending on the model and driver installed. The basic process is the same: open Printing preferences, find the Black & White option, enable it, and select OK to save.
1Open Windows Settings
- Open Windows Settings.
- Go to Printers & scanners.
Windows Settings
Open Printers & scanners from Windows Settings. Your screen may vary by Windows version.
2Open Printing Preferences
- Select the printer you want to configure.
- Open Printing preferences.
Printer settings
Select your printer, then open its Printing preferences. The location of this option can vary.
3Locate Xerox Black and White
- In Printing Preferences, locate Xerox Black and White (or your driver’s equivalent setting).
- Select it to open the black-and-white options.
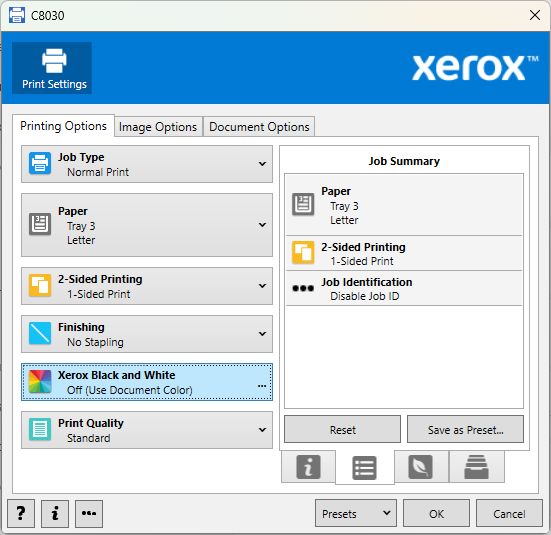 Click to enlarge screenshot
4Enable Black & White and Save
- Select Xerox Black and White.
- Click OK in the selection window.
- Click OK again in Printing Preferences to save the default.
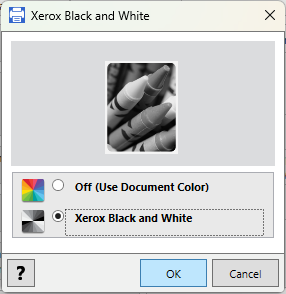 Click to enlarge screenshot
Remember: Changing Windows Printing Preferences sets the default for future jobs sent to this printer from your computer. You can still choose color for an individual job from within an application.
Questions? Contact Yakima Document Solutions if you need help with your printer settings.