
Enable Xerox Standard Accounting on Your AltaLink
Set up accounting to track printer use, add individual user codes, and optionally set usage limits.
1Open the printer’s internal web page
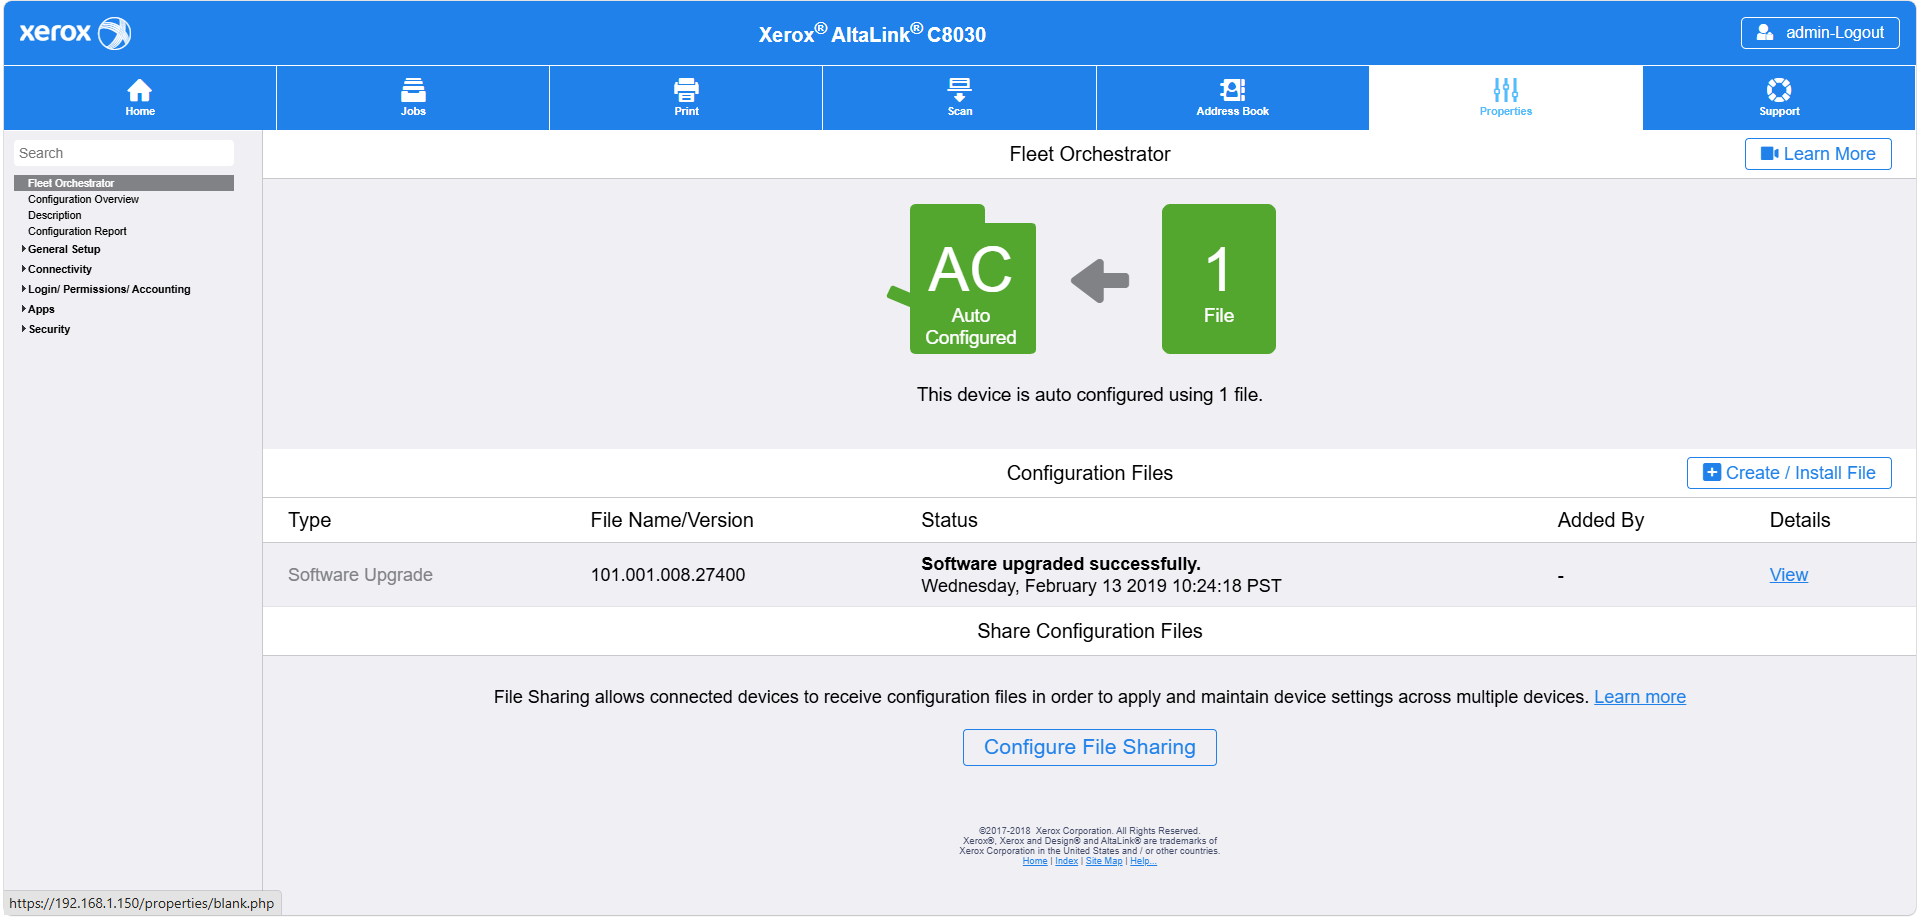
In a browser, enter your Xerox AltaLink printer’s IP address. Select Properties at the top. If prompted, sign in with your administrator credentials. In the left menu, open Login/Permissions/Accounting, then select Accounting Methods.
 Click to enlarge screenshot
2Select Xerox Standard Accounting
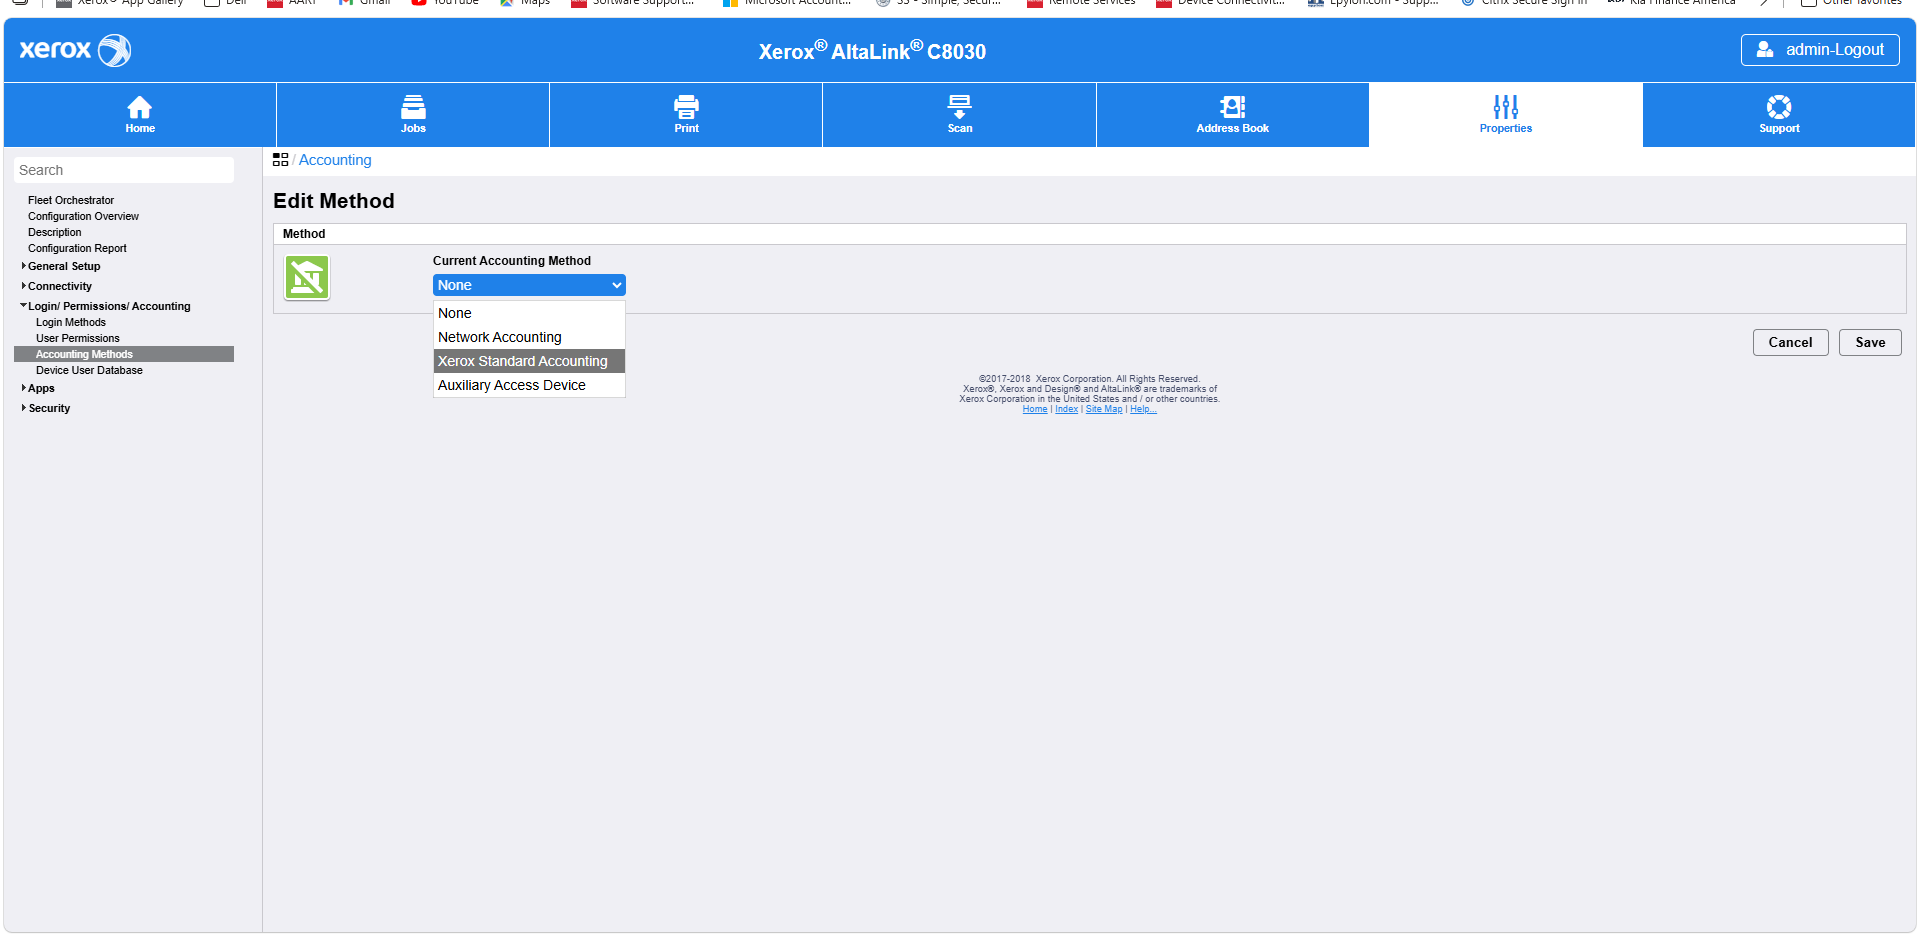
On the Accounting Methods screen, select Edit for the accounting method (the green building icon identifies the accounting method). Open the Current Accounting Method drop-down, choose Xerox Standard Accounting, then select Save.
 Click to enlarge screenshot
3Review the configuration settings
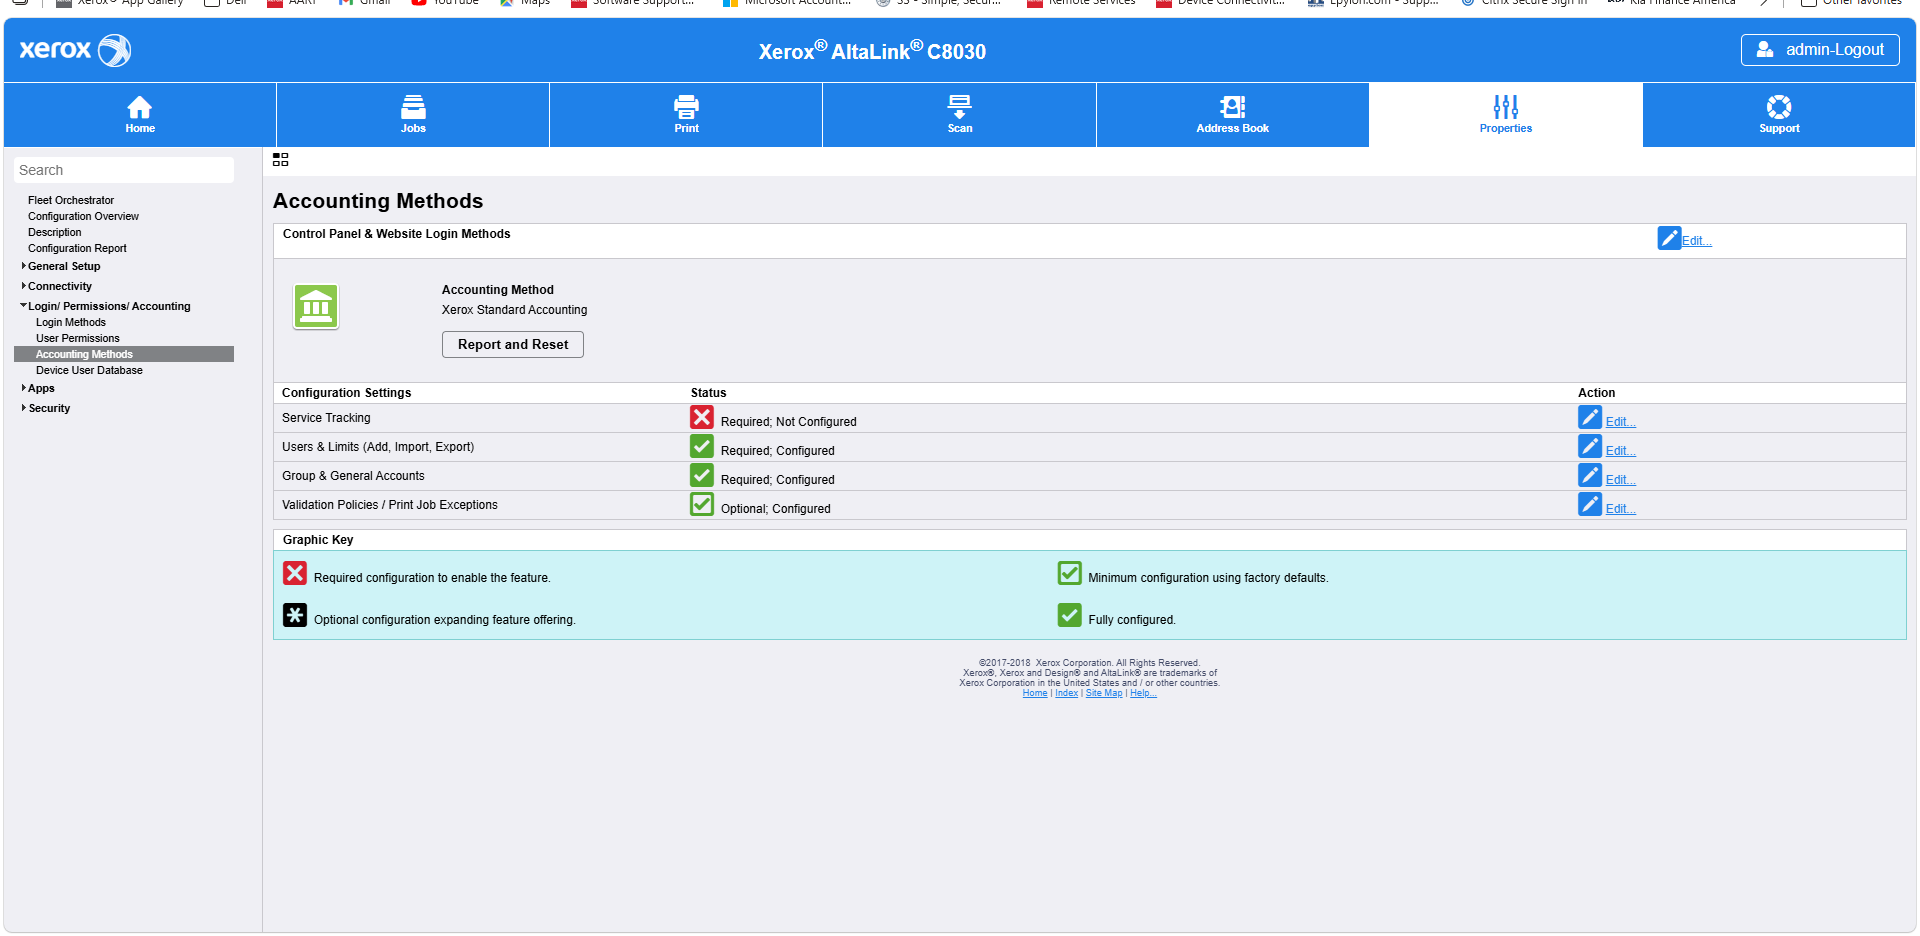
Back on Accounting Methods, use the Edit links on the right to configure the required sections. The status indicators help show which areas still need attention. Start with Service Tracking and Users & Limits; review other required settings shown on your device.
 Click to enlarge screenshot
4Choose what you want to track
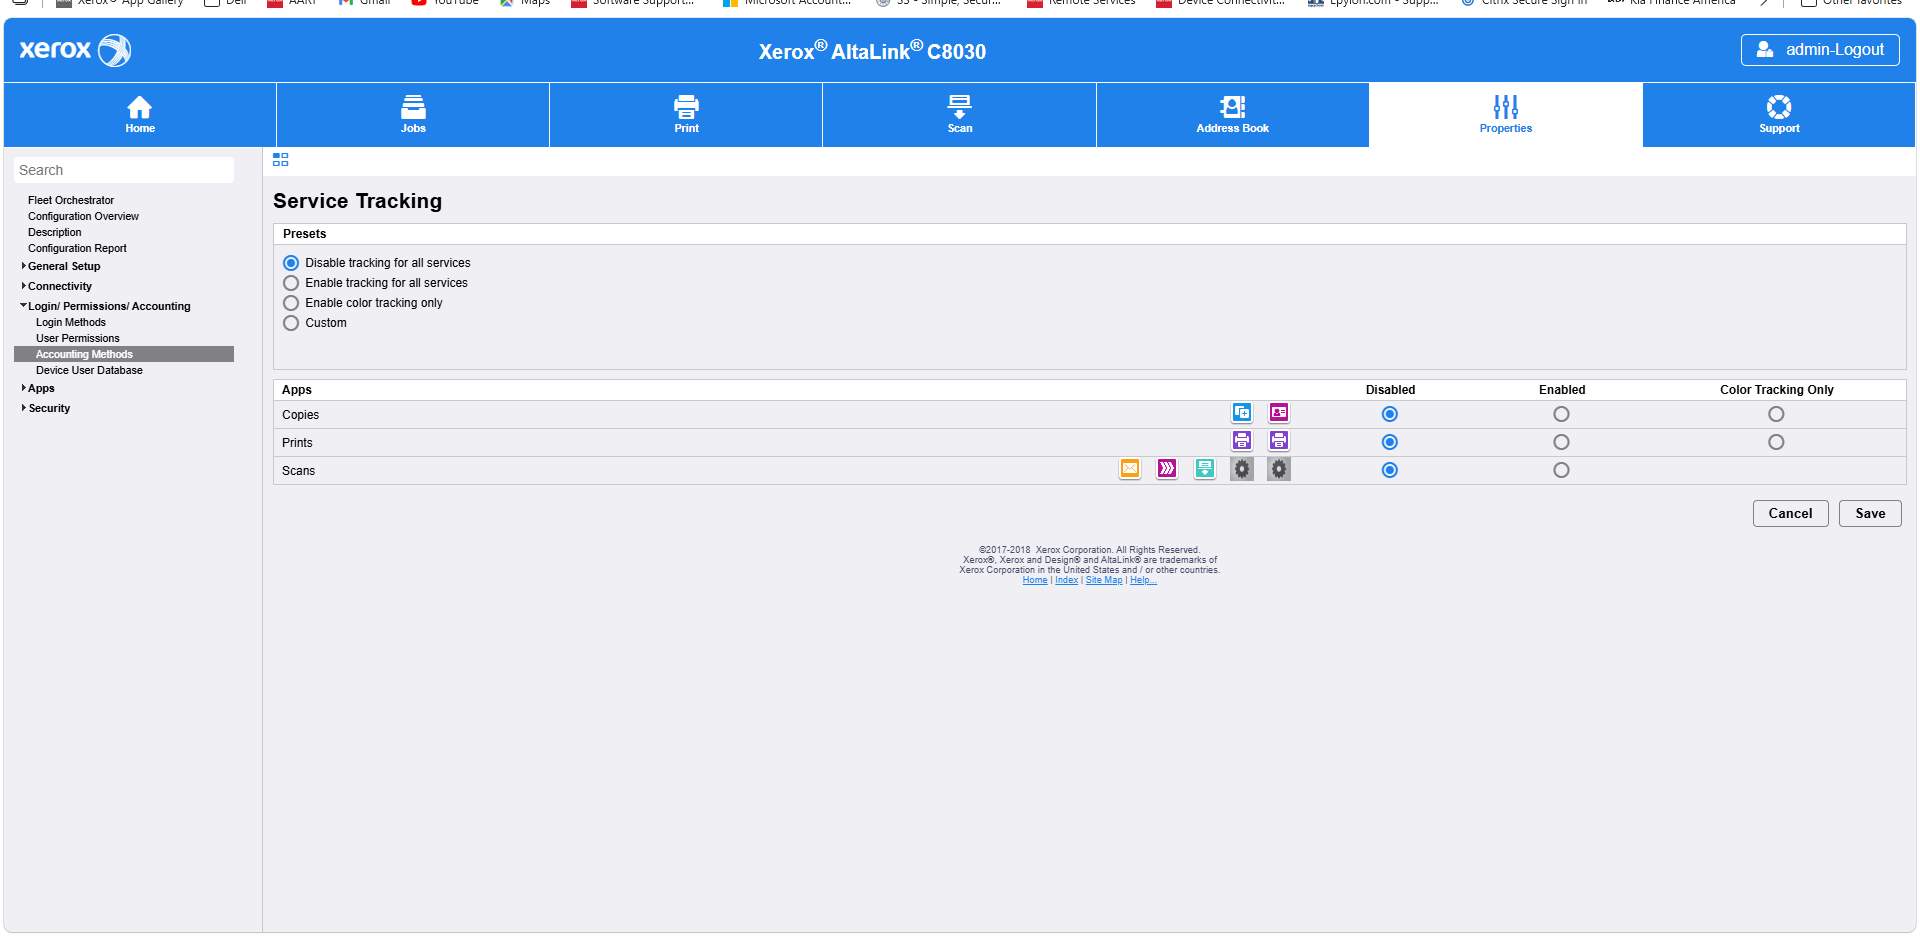
Under Service Tracking, choose whether to enable tracking for Copies, Prints, and Scans. You can leave services disabled, enable all services, or customize individual services. Select Save when finished.
 Click to enlarge screenshot
5Add a user
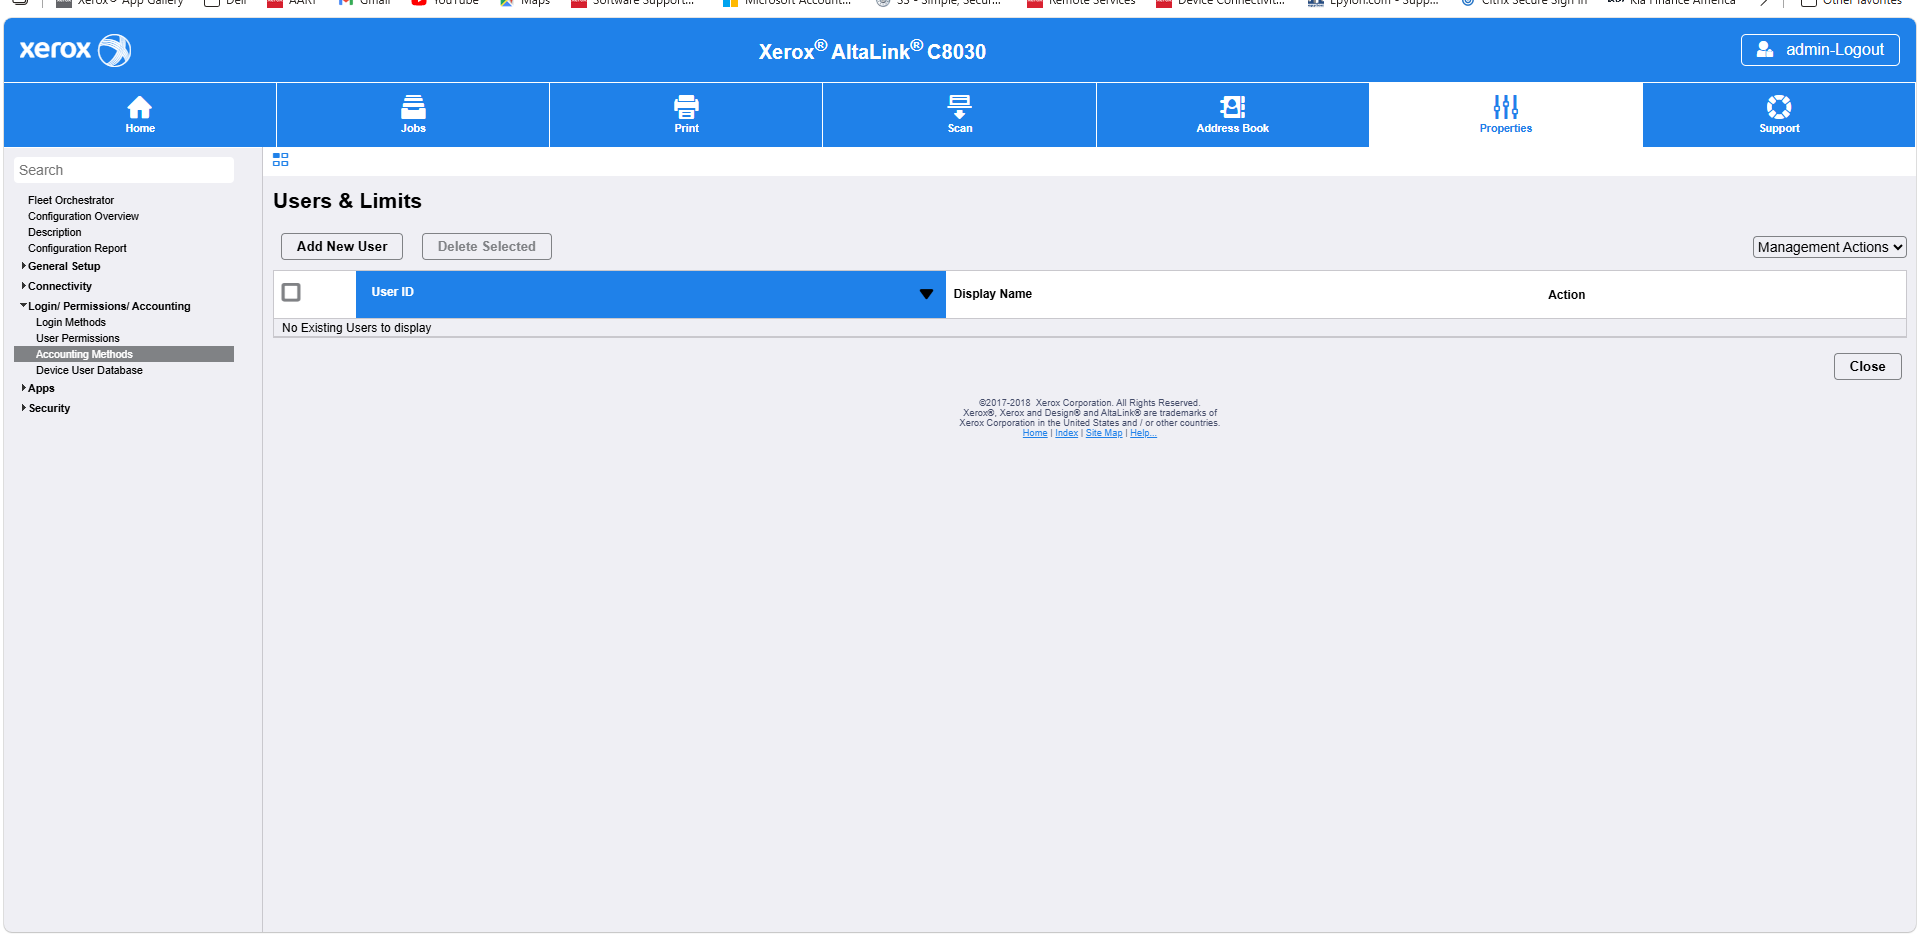
Return to Accounting Methods and select Edit for Users & Limits. On that page, select Add New User.
 Click to enlarge screenshot
6Enter the user’s name and accounting code
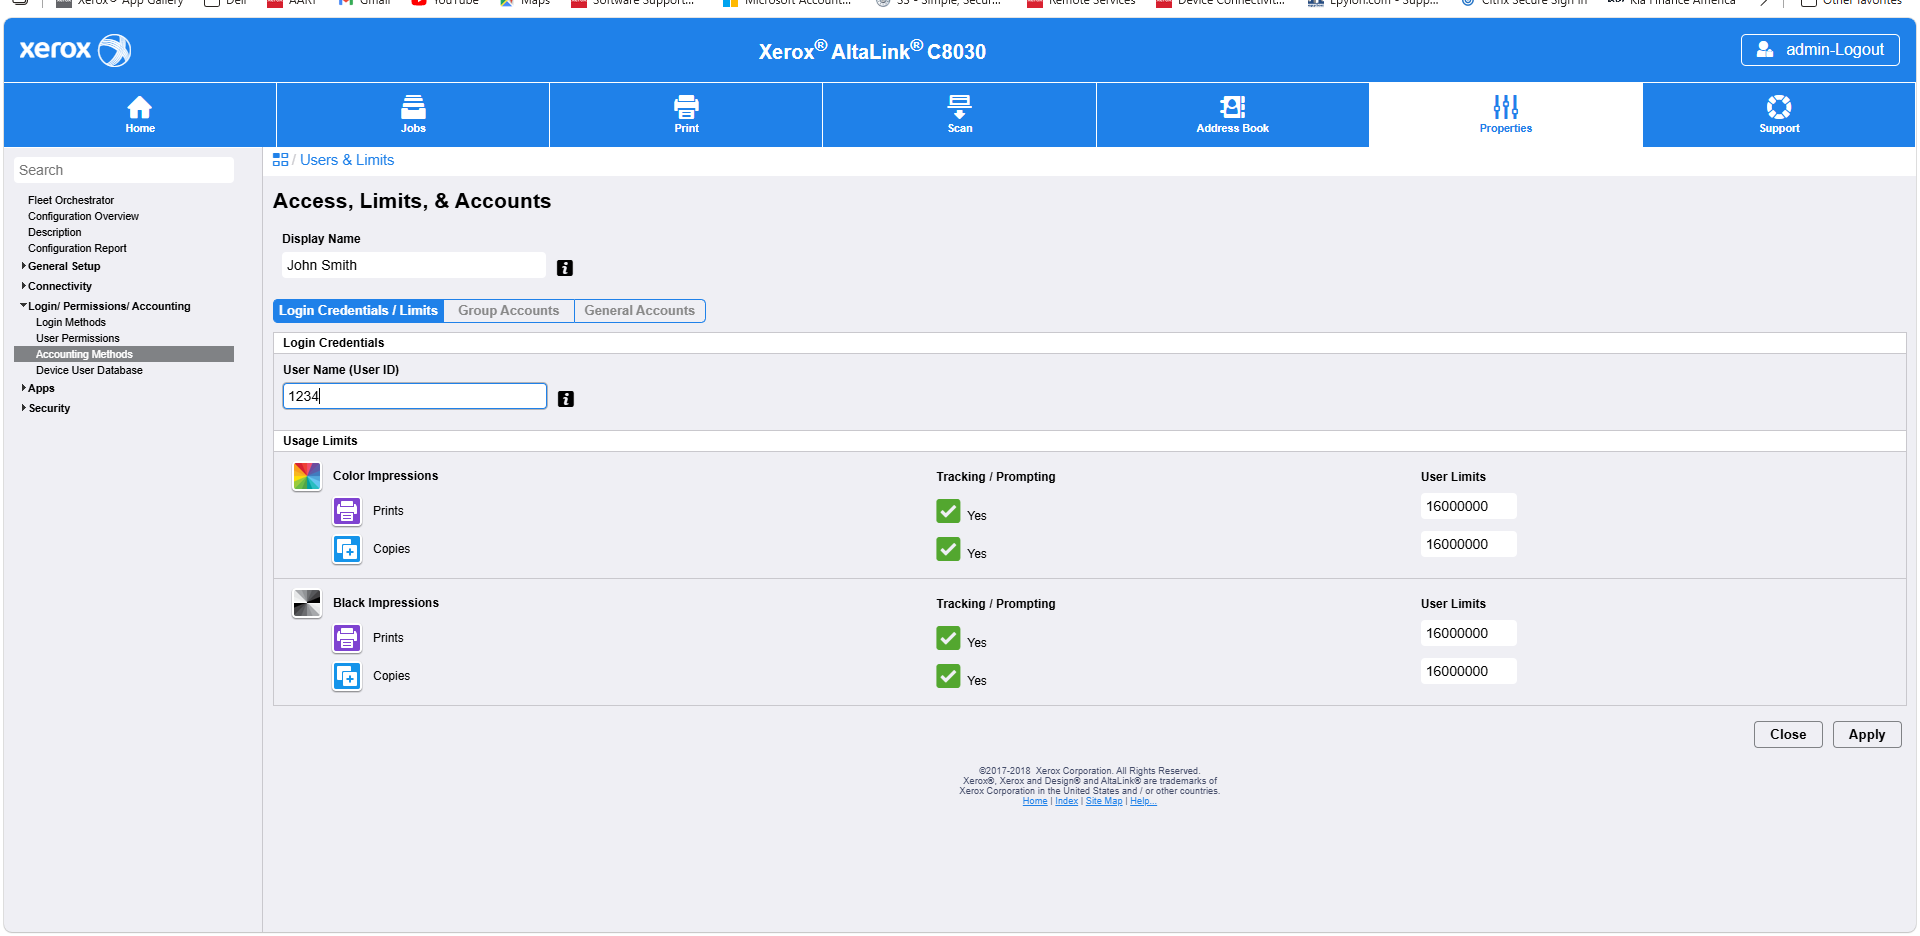
On Access, Limits, & Accounts, enter the person’s name under Display Name. Under User Name (User ID), enter the accounting code you want that person to use. For tracking only, leave the usage limits as desired and select Apply. To restrict usage, adjust the User Limits for color and black prints/copies before selecting Apply. Repeat for each user.
 Click to enlarge screenshot