
Scan to Email
Basic setup information for Xerox and Lexmark devices.
1
Information Needed Before You Begin
Scan to Email requires a few basic pieces of information from your email provider or IT administrator.
SMTP ServerThe outgoing mail server provided by your email provider. Example: smtp.gmail.com
SMTP PortThe port used by the mail server. Common examples are 587 or 465, but use the value supplied by your provider.
SSL/TLS Required?Use the encryption requirement specified by your email provider. The printer and mail server must agree on the connection security.
Email CredentialsThe username/email address and password or app password used by the printer to authenticate with the mail server.
DNS ConfigurationThe printer must be able to resolve the SMTP server name. Verify primary DNS, secondary DNS if available, and the network gateway.
Before you start: Ask your email provider or IT administrator for the correct SMTP server, port, encryption, authentication, and credential requirements.
2
Xerox AltaLink — Email Setup (Web Interface)
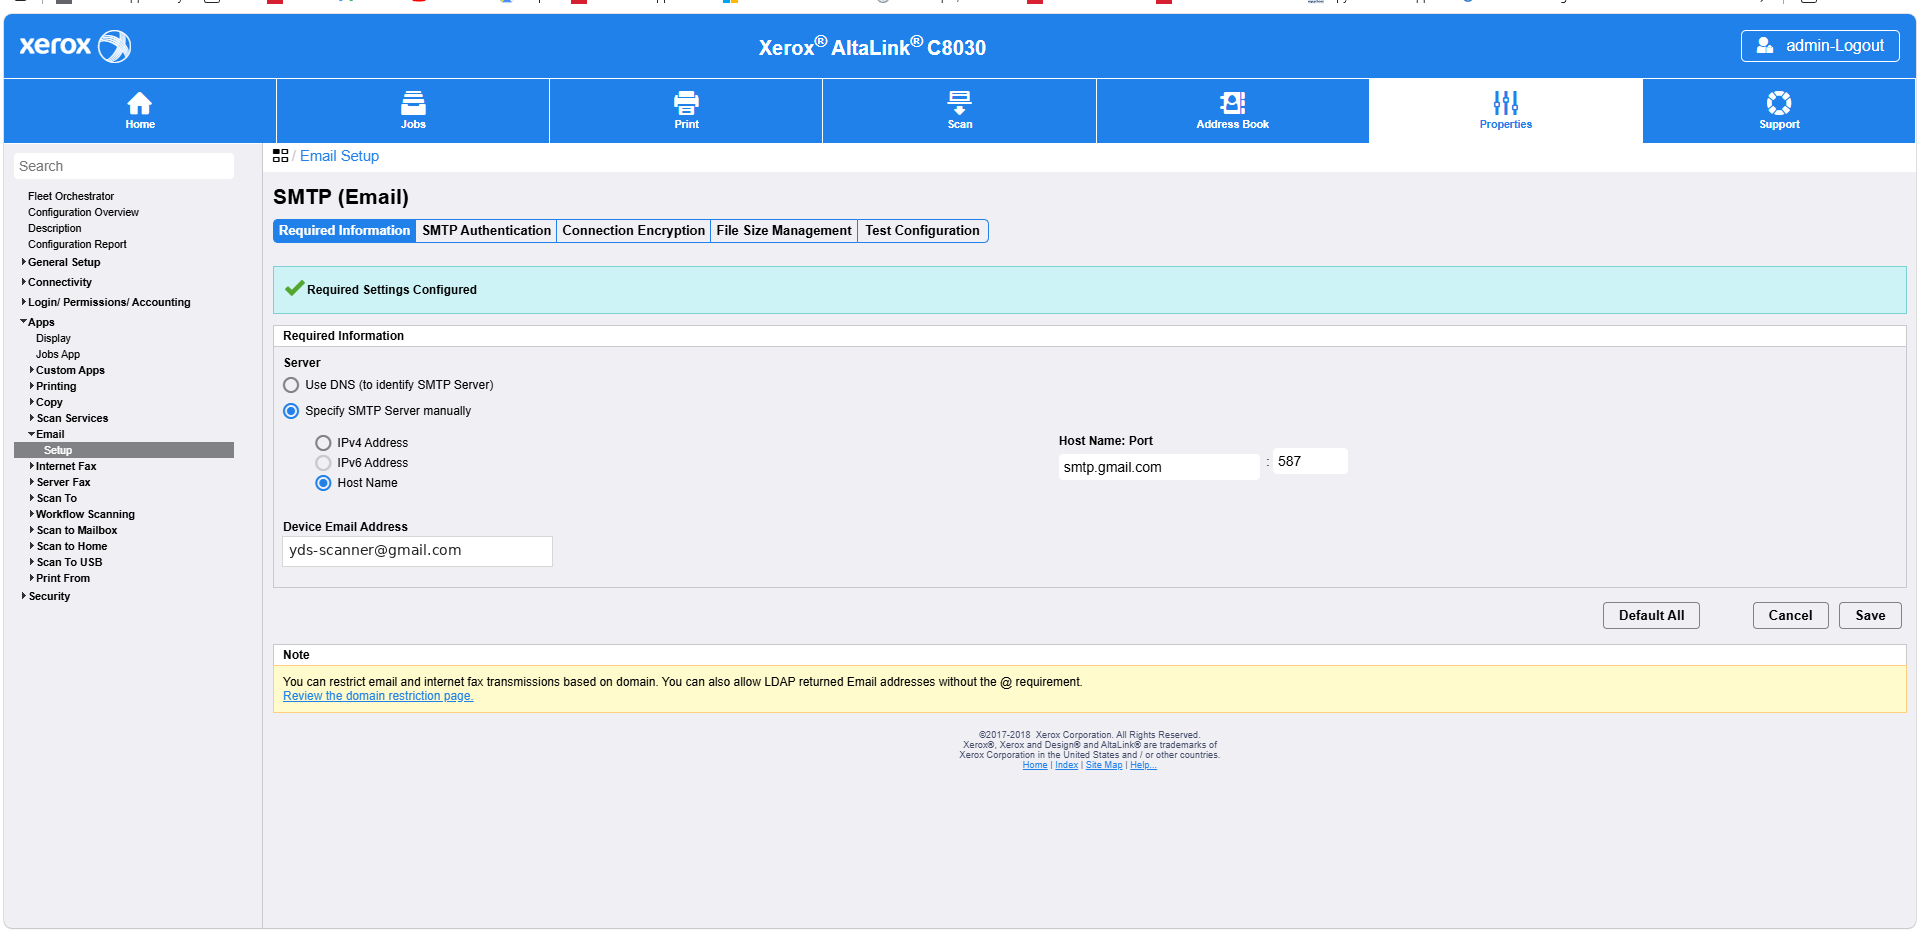
Xerox AltaLink Scan to Email is configured from the printer's web interface (Embedded Web Server). The screenshot below shows the SMTP Email setup page.
 🔍 Click image to enlarge
Key Settings on Xerox AltaLink
- SMTP Server / Host Name — Enter the outgoing mail server.
- SMTP Port — Enter the port required by your email provider.
- Connection Encryption — Configure the required SSL/TLS setting.
- SMTP Authentication — Configure the authentication method required by the mail server.
- Device Email Address — The email address the printer will send from.
Example only: The email address shown in this screenshot is a fictional example: [email protected].
3
Lexmark — Email Setup (Web Interface)
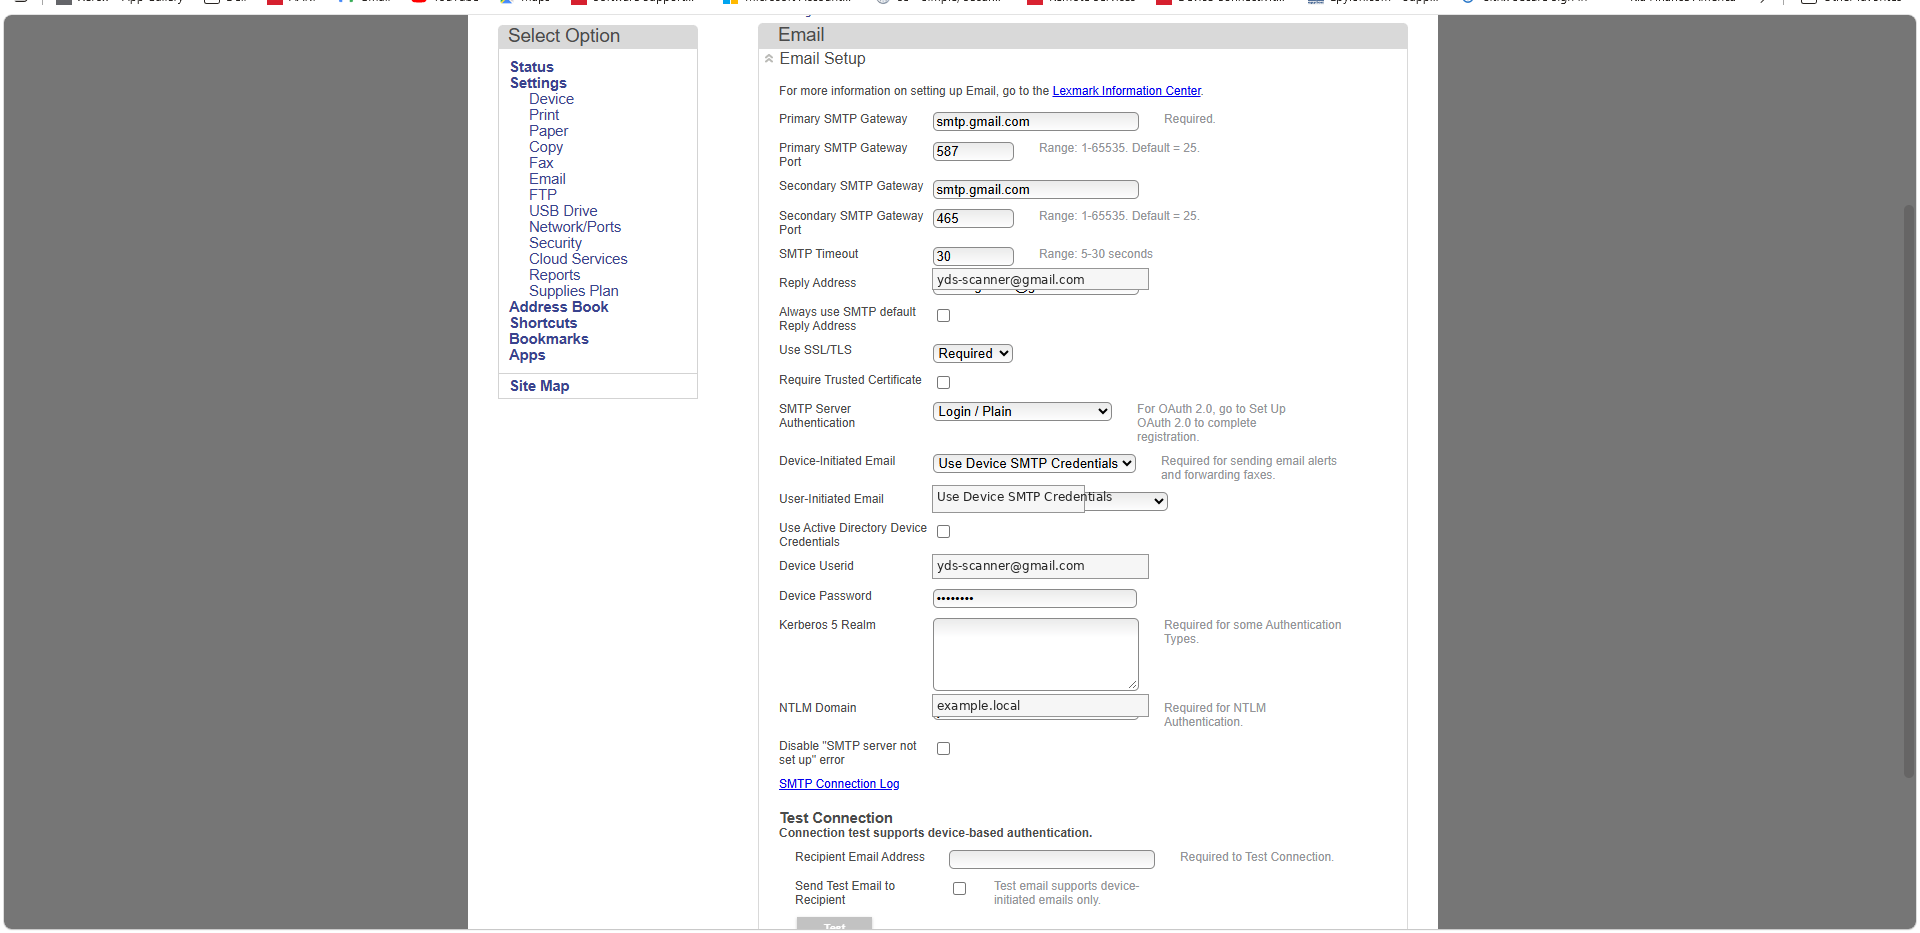
Lexmark Scan to Email is configured from the printer's Embedded Web Server. The available fields can vary by model.
 🔍 Click image to enlarge
Key Settings on Lexmark
- Primary SMTP Gateway — Enter the outgoing mail server.
- Primary SMTP Gateway Port — Enter the port required by your email provider.
- Use SSL/TLS — Select the encryption requirement for the mail server.
- SMTP Server Authentication — Select the authentication method required by the provider.
- Device-Initiated Email — Configure the device's SMTP credentials when required.
- User-Initiated Email — For Scan to Email, make sure this is configured to use the appropriate device SMTP credentials when required by the mail server.
- Device User ID / Device Password — Enter the email account credentials or app password used by the device.
Important: A successful connection test does not always mean a scan will send successfully. Test an actual Scan to Email from the device after saving the settings.
4
Test Scan to Email
After saving the email settings, test the complete scan workflow—not just the SMTP connection.
1. Save the settingsApply or submit the email configuration on the printer.
2. Test the connectionUse the device's test connection feature if available.
3. Scan a documentSend a real scan to an email address from the printer.
4. Confirm deliveryCheck the recipient's inbox and verify the scanned document was received.
If it doesn't work: Recheck the SMTP server, port, SSL/TLS requirement, credentials, and DNS settings. If the connection test succeeds but the scan fails, check the device's user-initiated email authentication settings.
Email addresses shown in the setup examples on this page are fictional and are provided for demonstration only.